Adding a loan
Quick example of adding a loan record through the API
For this guide, Postman will be used to import a new loan. Check out [Using Postman to test endpoints] (doc:using-postman-to-test-endpoints) for configuration assistance.
Adding a loan will require using the NLS XML Import endpoint.
This endpoint requires an XML script following NLS XML Loan Import Specs.
The following example creates a basic 1 year $10,000.00 simple interest loan with 10% interest, monthly payment period.
These are the XML attributes we will be using.
XML Attribute | Our Value | Details |
|---|---|---|
CommitBlock | 1 | We only want the contact record to be added IF all entries are successful. |
EnforceTagExistance | 1 | Let's make sure all the tags are correct. |
UpdateFlag | 0 | Value of 0 means that we are inserting a new record. |
LoanTemplateName | < DEFAULT > < and > needs to be escaped in XML. | A loan creation template. This stores most loan attributes. |
CIFNumber | 1 | Contact Number. Every loan needs to belong to a contact record. This sample loan will belong to contact "1". |
LoanNumber | DemoLoan | The loan number assigned. |
OriginationDate | 10/25/2021 | Origination date of the loan. |
LoanAmount | 10000.00 | Starting loan amount of the loan. |
MaturityDate | 10/25/2022 | Maturity date of the loan. |
XML Script Put Together
<NLS CommitBlock="1" EnforceTagExistence="1" ValidateAddress="0">
<LOAN UpdateFlag="0"
LoanTemplateName="<default>"
CIFNumber="1"
LoanNumber="DemoLoan"
OriginationDate="10/25/2021"
LoanAmount="10000.00"
MaturityDate="10/25/2022">
</LOAN>
</NLS>Postman Example
Now that we have our XML script ready, our next step is to open the /nls/xml-import request method in Postman.
In the Params tab we will set the test attribute to false and commit to the import.
Our XML script will go in the body tab. Body type will need to be set to raw. Also make sure to set the body format to XML.

The request is ready to go and we'll import the loan by clicking on SEND.
Authenticate FirstMake sure to authorize with a token before sending the request.
[Check out how to get an access token] (https://apidocs.nortridge.com/docs/get-access-token)
Response Example
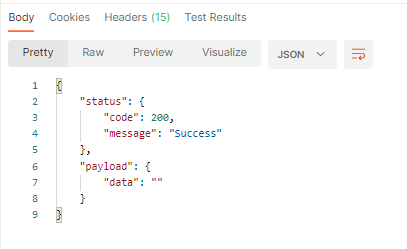
The request will return a status 200 if the import was successful.
A status code 400 means that there is an issue with the XML formatting or if the is a violation against the NLS Import Spec. Visit the Status Code 400 page for details.

NLS Web Client
The loan is now boarded in the NLS database. Here is the loan as shown in the NLS Web Client
Updated 6 months ago
